Tips On Finding An Automobile LCD Screen
As indicated by its name, Lorry LCD Monitor adopts LCD as its display screen. Comparing with the standard CRT car monitors, Automobile LCD Screens has obvious technical advantages. As the rate of LCD reduced in 2008, presently, Car LCD Screens has totally replaced the typical CRT automobile screens.

Automobile LCD Display has the complying with notable functions: little quantity, light, entirely flat, low usage, no glittering and no distortion.![]() Prior to picking a car display screens (https://luview.com/products/monitor/) LCD Screen, we need to have a look at the fundamental criteria.
Prior to picking a car display screens (https://luview.com/products/monitor/) LCD Screen, we need to have a look at the fundamental criteria.
1. Populate pitch
Dot pitch describes the range between the 2 bordering pixel point on the display. If the screen size if established, the display screen with a smaller dot pitch provides a more clear as well as fine picture. The information of dot pitch stems from the visible area separating the resolution. For the basic LCD, a dot pitch of 0.279 mm can present a penalty and also fragile photo. As for the Car LCD Monitors, which usually adopts CF Card Player or Vehicle Hard Disk Player, the dot pitch can absolutely satisfy the requirement, therefore, this specification can be neglected when it comes to Lorry LCD Displays.
2. Resolution
Resolution is one of the most vital buying specifications of Automobile LCD Screens. The higher of the resolution is, the better of the photo will be. Because Automobile LCD Monitors are usually of tiny size, it is a decent LCD if the resolution can get to 720 × 480.
3. Brightness
The optimum illumination of Automobile LCD Monitor is typically identified by the backlight. Presently, the brightness of the LCD varies between 250 ~ 500cd/m2. The higher of the illumination is, the picture will certainly be more gorgeous, nonetheless, the price will additionally be higher. Normally, the display with a brightness less than 250cd/m2 is unworthy taking into consideration.
4. Contrast ratio
The comparison ratio is additionally of much significance in the direction of Lorry LCD Display. The greater it is, the picture will be much more saturated, and also a lot more stereo. On the other hand, the reduced it is, the color will be poorer and also plain. Generally, the proper contrast ratio is above 200:1, as well as a greater one is roughly 400:1. If it is lower than 150:1, you should not select it.
5. Viewing angle
Seeing angle refers to the optimum angle from which people' eyes can see the screen. The ale, the far better. If the seeing angle is small, there will certainly be distortion on the photo if the customer's vision drifted a little from the display, even can not see the picture. The ideal checking out angle of the Vehicle LCD Screen is over 120 degree (Straight) and the vertical downwards checking out angle is above 70 °. Considering its expense, LCD is typically made with a upwards checking out angel of 75 ° and also a downwards watching angle of 55 °. If we do not offer it technical procedure, this sort of screen will certainly squandered its upwards watching angle and at the exact same time, the downwards viewing angle can't satisfy the need. Therefore, the Lorry LCD Screen must keep its display screen inverted to fulfill the demand in the lorry surroundings.
6. Action time
This parameter is necessary, therefore the truth that it establishes if there will be tail phenomena. Response time refers to the moment the LCD requires to switch over from brightness to darkness or vice versa. Typically speaking, the shorter the response time is, the better. If the response time is short, individuals will not encounter blur or lingering traces when they are checking out the relocating photos. According to the response time of the eyes, there will be slow-moving relocating images if the feedback time mores than 100 milliseconds. Currently, the conventional feedback time varies between 50-80 milliseconds, and some state-of-the-art LCD's feedback time varies between 25-30 milliseconds. There won't be tailing phenomena if the action time is at 80 nanoseconds. What deserves discovering is that reaction time consists of rising time and also coming down time, while some makes only indicate rising time or descending time, which might deceives our customers.
7. Shade
The expressiveness of the color is one of the most vital specification when picking Lorry LCD Displays. As all of us recognize, any kind of color of the nature is made up of three standard shades, particularly, red, eco-friendly and blue. Each independent pixel shade of the LCD is regulated by the three basic colors. A lot of the LCD's basic color gets to 6 numbers, that is 64 kinds of efficiency signs, then each independent pixel has 64 × 64 × 64= 262144 kinds of colors. A bulk of the LCD has only 262,144 colors, even the top-quality ones. The 32 figures( 16,777,216) labeled by the producers originates from interpolation or dithering formula, which is far poorer than the genuine 32 figures. The display can offer a great color if it reaches 26M.
The above stated are some important criteria when choosing a LCD, and also certainly, there are a few other specifications and approaches to check the quality of the screen. Nevertheless, you will certainly obtain an enjoyable LCD product if you keep the above 7 crucial criteria in mind.
Next, we will have a look at how to select the Automobile LCD Display
1. Dimension
Presently, three sizes are readily available for the instructors: 15", 17", 19", 26". The selection of the size should be the very first step of picking Automobile LCD Screen. If it's large, it will certainly lead to not only waste in investment, yet the space also, as a result, the choice of dimension is extremely important. Usually, the if the trainer's size is much less than 7 meters, it needs to be 15", as well as 17" or 19" for the train of 7 meters to 10 meters, and also for the trainers longer than 10 meters, it ought to choose 17" or 19". Some high-grade instructors might pick 26", as well as sleeper train usually choose 15".
2. Setup
Long-distance instructors generally select manual flip screens, consisting of forward-flip as well as backward-flip. High-grade trainers adopt mechanized flip screens, making the inside a lot more lavish. Bus advertisers ought to pick fixed setup, therefore it can not be folded up once it is mounted, to ensure that the display is always on.
3. Voltage
As a whole, gas engine automobile is 12V, and diesel engine lorry is 24V, and also we need to choose matching items. We do not always need to pick supposed 12,24 V compatible products, therefore the fact that it may cause numerous problems. Presently, the routine residential and also abroad Vehicle LCD Screen makes all take on 12V, 24 V apart design.
4. LCD
To get an all new Car LCD Screen is the most significant desire of every client, nevertheless, there are great deals of overhauled second-hand Automobile LCD Monitors of low cost as well as most definitely, the high quality of the product can not be guaranteed. Right here, I will offer you some suggestions on distinguish whether the display is new or old:
At present, the mainstream dimension are: 15"( 4:3), 17"( 4:3), 19"( 16:9). If you see various other dimensions with pretty small cost, after that you ought to beware.
On top of that, we need to observe the brightness. We need to be sharp if the illumination is as well reduced or too high. The brightness of 15" varies in between 250-400, 250-500 for 17" and 300-550 for 19". It is second handed if the brightness is also low, and spruced up one if the illumination is expensive. It's absolutely nothing of a key to install fluorescent tube on old display screens.
Lastly, we ought to have a look at the port. If the recently manufactured Lorry LCD Screen is substitute port, then you need to not select it, because LVDS digital port has actually been the mainstream port considering that 3 years earlier.
5. Inverted Screen
Given that downwards checking out angle is of much relevance to the lorry displays, upside down screen modern technology is also vital. You can switch on the monitor and also make a contrast of the downwards and also upwards, then you will certainly recognize whether it is a great one or negative.
6. Explosion-proof
Because Automobile LCD Displays are used in public places, the defense of the LCD is of much relevance, and also select the explosion-proof item is the first option when buying the Lorry LCD Monitors, especially in buses. Additionally, you must try to pick HD products if possible, considering that it truly provides great images. Besides the reliable superior items, we after-sales service is an additional crucial element. You must not select the set up items, considering that it has congenital problems in there layout, although it guarantees a 3 months warranty.
Auto Display Installment Clarified

One of the most vital things that you will require to contemplate prior to also trying to set up a normal vehicle DVD screen, or execute a challenging headrest monitor install, is what sort of tools will be required for the task. Despite the fact that each automobile as well as each vehicle screen system is different there are still some basic products you will more than likely requirement to efficiently finish the car monitor tft screen installation process. Most of tasks you will call for needle nose pliers, a level head screwdriver, a Philips-head screwdriver, and also a combination wire remove and kink tool. Various other tools to take into consideration are a panel tool, energy knife, ratchet/socket set, drill/bit set and a torque motorist set too. Bear in mind that this is only a list of the extra fundamental tools that are needed and also countless various other tools may also be required as you proceed with your mount task.
 To start with, you require to start by completely reviewing the instructions and ensure to examine any kind of schematics provided with the auto DVD display to ensure you entirely comprehend the whole procedure of successfully installing it properly.
Despite the fact that there are numerous makes and models of cars and truck DVD checks on the marketplace, they are still normally made up of 3 crucial parts. These include the DVD gamer itself, the LCD or TFT display, as well as the audio system. Furthermore, you will require to comprehend that there are 4 main various kinds of setups that will cause you to experience 4 differing levels of difficulty.
They are as complies with:
2 CACOPHONY Vehicle Screen System
The term 'RACKET' is really an internationally approved criterion for in-dash vehicle multimedia devices. The number 2 in front of the CACOPHONY essentially implies that it is a basic dual deck slot size.
This particular sort of system is mounted into the dashboard of a lorry as well as will most likely make it a little harder to install, particularly if you are attempting to do it from square one. Given that a dual RACKET car display system includes the largest and also most aesthetically pleasing display for your amusement requires it is probably worth all the effort.
2DIN automobile monitors, for the a lot of part, are composed of an integrated dvd and a level screen gamer. They also have actually an amplifier built right into the dashboard device also. You might uncover that even more device mounts and also connectors are needed to get the auto screen to be seated in its port well. Setup of this preferred design of system requires a great deal of re-wiring. If the outer edges of the screen are also large or as well little for a non-standard stereo slot then you might have to carry out a personalized resizing or remodelling of the dash to ensure the device fits appropriately without any type of problems. An excellent general rule is to double and even triple check the measurements of your control panel port before also acquiring an all new car monitor to mount. In this manner you do not lose time or cash.
In the process of your car screen install you will certainly probably have to run cables from the head device all the method to the individual audio speakers in the front, side as well as back of your automobile. All other secondary input tools, such as backup cameras or Bluetooth kits, will also need this. An important point you must account for is to ensure that you are not running a wire to both ends of the emergency break wire because it is considered to be prohibited in many countries to be able to operate the display when the auto is in movement. The only exemption to this policy would be that you are running a back view electronic camera while reversing your vehicle. A last note is that you will additionally need to wire the car screen gamer to the power supply of your vehicle.
1 DIN Car Monitor System
This particular kind of vehicle monitor is significantly similar to the 2 CACOPHONY since it is additionally installed into a control panel and is requires a lot of electrical wiring to have it set up correctly. However, the 1DIN car monitor player just occupies 1/2 of the required space of a 2DIN unit. Despite the fact that it appears simpler to attempt this sort of cars and truck display installment you may need to personalize the port dimension in the dash to make sure it fits tightly into its designated spot. Similar to the 2 RACKET cars and truck monitor system it is composed of a shade TFT or LCD display, DVD gamer and amplifier. All the connections, installing braces, as well as circuitry are most definitely required however might not constantly be included by the manufacturer in your purchase.
Different Layout Automobile Keeps An Eye On
This course of vehicle monitors is much less difficult to install than the 1or 2 CACOPHONY monitors but it will still pose you with some special problems. While it holds true that you do not require to fit the brand-new electrical elements to existing components of the car you are still called for to perform a substantial amount of wiring and rewiring to see to it the system is properly linked to an adequate power supply and also stereo to maximize your mobile multimedia experience. This type of car keeps an eye on installment you will certainly call for screws, cords, as well as adhesive.
For a headrest display mount you will require to separate the equipped headrest from the seat and run power and also link cords down through the hole. Most of autos or vehicles need to enable you to get rid of the cover off the base of the seat and also placed an unwound clothes hanger up through the slot to situate the cable television and also pull it out. Afterwards you can run the cable under the carpet to the major head unit in the dashboard or directly to one more link box in one more place in your car.
Other distinct automobile displays, such as a sunlight visor DVD display or expenses cars and truck DVD display, will require you to take into consideration other crucial elements such as how to deal with the player to the ceiling of your auto and also exactly how to wire the DVD monitor so that the wires can not be seen by the passengers. When installing the roofing display you will need to mount it in the facility of the vehicle for maximum strength. After that you will certainly require to conceal the wires below the ceiling panels by running them from the head system to the dash or power supply. As you can see, this might call for a great deal of work as some panels and also possibly even the seatbelt will certainly have to be eliminated. Sunlight visor DVD monitors are not as difficult to mount considering that the wires do not need to be expanded as well far to be affixed to the power resource or primary adaptor. Yet they will still require some cautious focus when eliminating as well as re-attaching car panels.
Clip-On Automobile Keeps Track Of
When it comes to moving from place to area, this one is the most basic and also most adaptable type of monitor to install. They usually consist of headrest, sunlight visor and also arm remainder cars and truck monitors. You must have the ability to connect a clip-on monitor right into a cigarette lighter as well as clip them onto their designated area.
Since you have a better idea of the 4 types of vehicle monitor installations you need to take into consideration some vital points.
The supplied techniques as well as ideas information is just a small portion of the things that you will certainly require to understand to assist you in an installation process. Installing an automobile DVD system is not something to be done lightly, specifically when you are attempting to mount a 1 or 2 HULLABALOO cars and truck display or trying to execute a complicated headrest display set up.
If you are significant regarding properly mounting a DVD multimedia player, and have the right resources to try it, it is of utmost significance that you function methodically and also thoroughly to avoid any kind of confusion or unneeded hold-ups.
Some things to think about are:
1. Researching the installment job: Check out over and make certain you recognize all the instructions for the elements you are mosting likely to mount. A great suggestion is to browse the web as well as search to see if anyone has attempted any kind of electrical wiring prepares for your particular car make as well as model.
2. Get ready for the assignment before you start: If you are trying to mount a 1 or 2 CACOPHONY install you will certainly require to ensure you have all the needed tools, cords and accessories. In addition, you will certainly also require to offer on your own a couple of days with no interruptions to extensively complete the task.
3. Remove existing components thoroughly and also skilfully: It is essential that you do not lose any important parts or harm your old stereo unless you prepare to keep the vehicle display in your car when you market it later. Laying out panels as well as parts in connection with their location on the automobile with all their screws on the panel will greatly lower browsing time in your installment procedure.
4. Maintain your work tidy and also neat: When electrical wiring or rewiring see to it that the cords themselves are as tight as possible as well as prevent them from coiling up.
Individuals that hurry head first right into a cars and truck display installment project will normally discover themselves embeded a time consuming project which often ends up with frequently risky as well as undesired results.
There is definitely nothing worse than a vehicle with cords spread completely through it. An expert installer would certainly constantly makes certain that wires were tidied away someplace behind the paneling of the vehicle in nice neat straight lines. By meticulously taking the time and preparing to properly do a cars and truck display install you can accomplish similar results. Also, it is necessary to be familiar with sound and also visual issues that can turn up from hastily assembled systems. Troubles that might develop can consist of black holes in sound, flickering screens, or loose rattling parts just to call a few.
The vehicle as well as inevitably on your own if you do n`t take the time to perform an automobile monitor install appropriately it can be a safety and security danger to the system. , if 2 wires are revealed they can short circuit each other and also cause your new in-car DVD gamer to be inoperable.. Cables that have been positioned too carefully with each other, in a malfunctioning car screen installation, for also lengthy of a period will certainly fuse generating a temperature so warm it can ignite creating a cars and truck fire. So play it safe as well as comply with these helpful tips and also methods in trying a correct car or headrest display set up.
How To Set Up An LCD Screen In Your Cars And Truck

 Cars are progressively equipped with a means to keep every one of the guests captivated during a journey or provide instructions throughout a lengthy trip. Mounting an LCD keep an eye on in your automobile adds aesthetic amusement and practical performance. The LCD check could be made use of for enjoying DVDs, playing video clip games, or for GPS navigating systems.

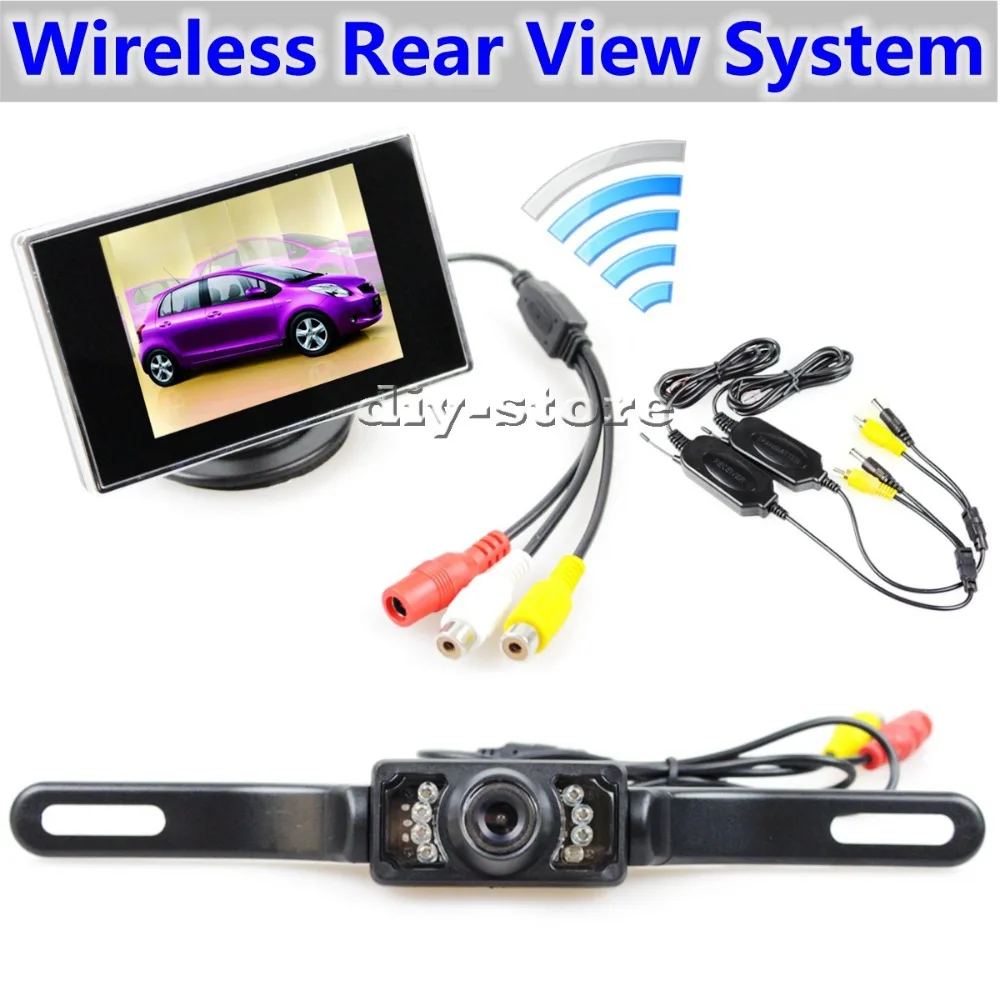
Whole lots of vehicle owners spend in LCD checks planned for watching behind the vehicle. This kind of LCD screen is referred to as a reverse video camera monitoring system. The monitor turns on when the vehicle is in reverse and also lets the driver understand what is behind the car.
LCD monitors can be located in 3 places in an automobile: the middle of the control panel or console area, the ceiling or indoor roof covering in Vans or suvs, or affixed inside the headrest of the front seats.
The LCD check mounted in a control panel is normally utilized for navigation and also video purposes. Most LCD screens are touch screen as well as have a normal quantity of video storage space.
Many LCD keeps an eye on set up right into the ceiling or interior roofing of a sporting activity utility lorry or van are normally utilized for video clip or Television use just. Headphone jacks are normally set up near the passenger's seat for simple accessibility to allow passengers to listen to the video clip footage with no diversions to the vehicle driver.
It is ending up being a lot more usual to mount LCD screens inside the headrest of the pole positions. These screens are created passengers to watch flicks and play video games. There might be a pc gaming console or the LCD keep an eye on might have preloaded games for an audience's choice.
Part 1 of 3: Choosing the best LCD keep an eye on
Action 1: Consider what sort of LCD check you intend to set up. This determines the place of the screen in the automobile.
Step 2: Look for all accessories. After that when you have purchased the LCD check, inspect the package for all the products.
You may require to buy extra things, like butt adapters or extra electrical wiring to path a power source to the display.
Component 2 of 3: Setting up an LCD keep track of in your vehicle
Materials Needed
- Boxed end wrenches
Butt ports
Digital volt ohm meter (DVOM).
- Drill with small bit.
Emery fabric 320 grit.
- Flashlight.
- Flathead screwdriver.
- Masking tape.
- Gauging tape.
- Needle nose pliers.
- Phillips screwdriver.
- Safety handwear covers.
- Ratchet conventional and w/metric outlets.
- Security glasses.
Side cutters.
- Torque little bit set.
Utility blade.
- Wheel chocks.
Cord crimpers.
Cable pole dancers.
Zip connections (3 count)
Action 1: Park your vehicle on a level, hard surface area.
Action 2: Place wheel chocks around tires. Involve the hand brake to maintain the rear tires from moving.
Action 3: Set up a nine volt battery saver into your cigarette lighter. This maintains your computer live and maintains your setup present in the car lcd screen hdmi.
If you do not have a 9 volt battery saver, that is ok.
Tip 4: Open up the automobile's hood to separate your battery. Take the ground wire off of the battery's negative post disabling the power to the entire automobile.
Installing an LCD check into the dashboard:
Tip 5: Remove dashboard panel. Remove the mounting screws to the dash panel where the screen will certainly be mounted.
Get rid of the dash panel. If you plan on reusing the dash panel, you will need to reduce the panel to fit about the screen.
Step 6: Get the LCD check out of the package. Install the display into the control panel.
Action 7: Find a power wire. This cord must provide power to the display only when the secret is in the on or accessory position.
Hook the power cable approximately the screen. You may need to expand the wire.
Note: You might need to run your very own power supply to the display. Make certain to connect the power supply to a terminal or cable that has power only when the key is in the on or accessory placement. To do this, you will certainly require a DVOM (electronic volt ohm meter) to inspect the power to a circuit with the key on and off.
Caution: Do not try to use a resource of power with a things that is connected to the vehicle's computer system. If the LCD monitor were to short out internally, after that it's possible that the car's computer system might short out too.
Tip 8: Attach the remote power to the crucial resource as well. Mount additional cords if required to power up the device.
Use butt adapters to connect cords with each other. If you mean to use a circuit, use a splice port to junction the wires together.
Installing an LCD monitor on the ceiling or indoor roofing system:
Step 9: Eliminate the caps on the grab deals with in the traveler compartment. Get rid of the back passenger side grab takes care of.
Action 10: Draw the molding loose over the passenger doors. This enables you to locate the roof covering support, which is just a couple of inches behind the hump in the headliner.
Action 11: Usage gauging tape to gauge the facility point of the headliner. Push strongly with your fingertips into the headliner to really feel for the support bar.
Mark the location with covering up tape.
- Note: Ensure that you measure two times and confirm the area of your markings.
Action 12: Measure from side to side of the car. When you have located the center of the assistance bar, after that mark an X right away with an irreversible marker on the tape.
Tip 13: Take the mounting plate and line it approximately the X. Utilizing your pen, spot mark the mounting tube onto the tape.
Action 14: Drill an opening where you made the mounting marks. Do not pierce through the roof covering of the car.
Tip 15: Situate where the power supply takes place the roofing near the display brace. Cut a tiny hole into the textile on the roof covering utilizing an utility blade.
Step 16: Straighten a coat hanger. Connect a new cable to the coat hanger and also feed it via the opening you made as well as out via the molding that you peeled off back.
Step 17: Tap the wire right into the dome light power circuit with trick on just. Make certain that you use a one size larger cable to minimize warm as well as resistance.
Step 18: Mount the placing plate onto the ceiling. Screw the mounting screws into the ceiling support bar.
- Note: If you plan on utilizing your stereo system for sound, you will need to send out RCA cords from the cut opening to your handwear cover box. This causes your needing to remove the molding and also peel up the carpeting to the floor to conceal the wires. When the cords are at the glove box, you after that can add adapters to sent it to the stereo as well as hook it approximately the outcome RCA channel.
Action 19: Install the LCD keep an eye on to the bracket. Attach the wires to the monitor.
Make certain that the cables are beneath the LCD monitor base so they are concealed.
- Note: If you intend on using an FM modulator, after that you will need to send out the power and also ground cords to the modulator. Most modulators fit perfectly under the glove box alongside the stereo. You can take advantage of the fuse box for a power supply that is active only with the type in the on or accessory placement.
Tip 20: Put the molding back into location over the automobile doors and also secure it. Set up the grab manages back onto the molding where they came off.
Place the caps on cover the screws. If you got rid of any other coverings or peeled up the rug, see to it to safeguard the coverings and also placed the carpeting back into place.
Mounting an LCD keep track of on the back of the front seats:
Tip 21: Determine the blog post's inside and outdoors diameter for correct fit.
Step 22: Remove the headrest on the seat. Some cars have tabs that you push in to help in the elimination.
Other automobiles have a pin hole which need to be pushed using a pick or a paperclip to eliminate the headrest.
- Note: If you intend on using your headrest and mounting a flip up or down LCD check, after that you will certainly need to gauge the headrest as well as mount the LCD monitor onto the headrest. Pierce out 4 holes to place the LCD bracket. You will be drilling right into the headrest steel brace. After that you can mount the bracket to the headrest as well as mount the LCD keep track of onto the brace. Many LCD monitors come pre-installed right into a headrest like the one in your lorry. Essentially, you are just switching out the headrest for an additional one, nevertheless, it does cost even more.
Step 23: Remove the posts from the headrest. Switch over out the headrest with the one that has the LCD keep track of in it.
Step 24: Move the posts up with the wires to the new headrest with the LCD monitor in it. Screw the poles onto the headrest hand tight.
Action 25: Remove the backing of the seat. You will certainly require a flat pointer screwdriver to tear out the back panel of the seat.
- Note: If your seats are completely upholstered, after that you must unclasp the upholstery. Completely recline the chair and find the plastic hold. Thoroughly pry on the seam to open and after that meticulously tear apart the plastic teeth.
Action 26: Set up the headrest with the LCD keep track of into the seat. You will certainly require to feed the cables with the placing openings on the seat's poles into the back of the seat.
Step 27: Run cables via seat product. Once the headrest is mounted, you will require to run the cables via the seat towel or leather material to simply under the seat.
Slide a rubber hose pipe or something similar that is rubber over the wires for security.
Action 28: Guide the cords behind the seat's back steel brace. This is a tight fit, so make certain to put the rubber tube on the cables straight over the area of the steel support.
This protects against the cable from massaging via on the seat's metal brace.
- Note: There are 2 cords coming out of all-time low the chair: the power cord and also the A/V input cord.
Tip 29: Snap the back of the seat back together. If you had to re-upholster the seat, then clip the teeth back with each other.
Shut the seam to secure the seat with each other. Sit the seat back up to the typical setting that it was initially in. The set will come with a DC power jack to install the power cable to the lorry. You have the alternative to tough cable the LCD check or make use of the cigarette lighter port.
Difficult circuitry the DC power jack:
Tip 30: Locate the power cord to the DC power jack. This cord is generally bare as well as has a red fuseable web link.
Action 31: Interlace right into the power cord to the power seat. Make certain it is the seat that is run only when the secret is in the ignition in the on or accessory position.
If you do not have power seats, you will require to run a cord to the circuit box under the rug in the car as well as area it into a port that is just energetic when the key remains in the ignition and also put on the on setting or accessory setting.
Action 32: Locate the mounting screw to the seat brace that installs to the vehicle's floor board. Get rid of the screw from the bracket.
Use emery cloth at 320 grit to clean off any paint from the brace.
Action 33: Place the black cable's eye fitting end onto the bracket. The black cable is the ground wire to the DC power jack.
Put the screw back into the brace and also tighten up hand limited. As you tighten the screw tight, keep the eye installation from turning the wire up.
Step 34: Link the DC power jack cord to the cable protruding of the rear of the seat. Roll up the cable television and zip link the slack and also DC power jack to the seat's bracket.
Make sure to leave some slack for the seat to move onward as well as backwards (if the seat relocations).
Action 35: Attach the LCD keep an eye on set's A/V input cord to the A/V input cable television standing out of the seat. Roll up the cable television and connect it off under the seat out of the means.
This wire is only made use of if you are meaning on setting up another device like a Playstation or some kind of input device.
Action 36: Reconnect the ground cable television back onto the battery's unfavorable article. Get rid of the nine volt battery saver from the cigarette lighter.
Step 37: Tighten up the battery clamp. Ensure that the link is excellent.
- Note: If you did not have a nine volt battery saver, you will have to reset every one of the setups in your vehicle, like your radio, electrical seats, and electrical mirrors.
Component 3 of 3: Testing the mounted LCD keep track of
Step 1: Switch on the ignition to the device or run setting.
Action 2: Turn the power on the LCD monitor. Check to see if the screen begins and also presents its logo design.
Open the screen up as well as mount a DVD if you installed an LCD keep track of with a dvd gamer. Verify the the dvd plays. Connect headphones to the headphone jack on the LCD keep track of or to the remote jack as well as examination the sound. If you routed the sound via the stereo, put the stereo on the input network and examination the sound that is coming in from the LCD keep an eye on.
If your LCD monitor does not operate after installing the LCD keep an eye on into the car, after that there might be additional diagnosis of the LCD keep track of assembly needed. You should seek out aid from one of YourMechanic's certified auto mechanics if the problem persists. If you have any questions about the procedure, make sure to Ask a Mechanic for some fast, handy guidance.